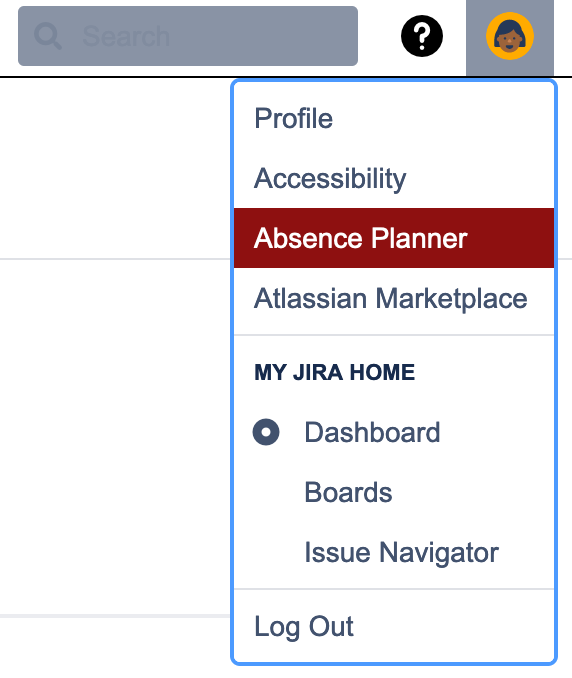
Every user can access his Absence Planner via the public user profile or by clicking on the avatar in the top right corner in Jira.
To add a new absence entry, click on “Add Absence” button. On the opened dialog, details on the planned absence can be inserted.
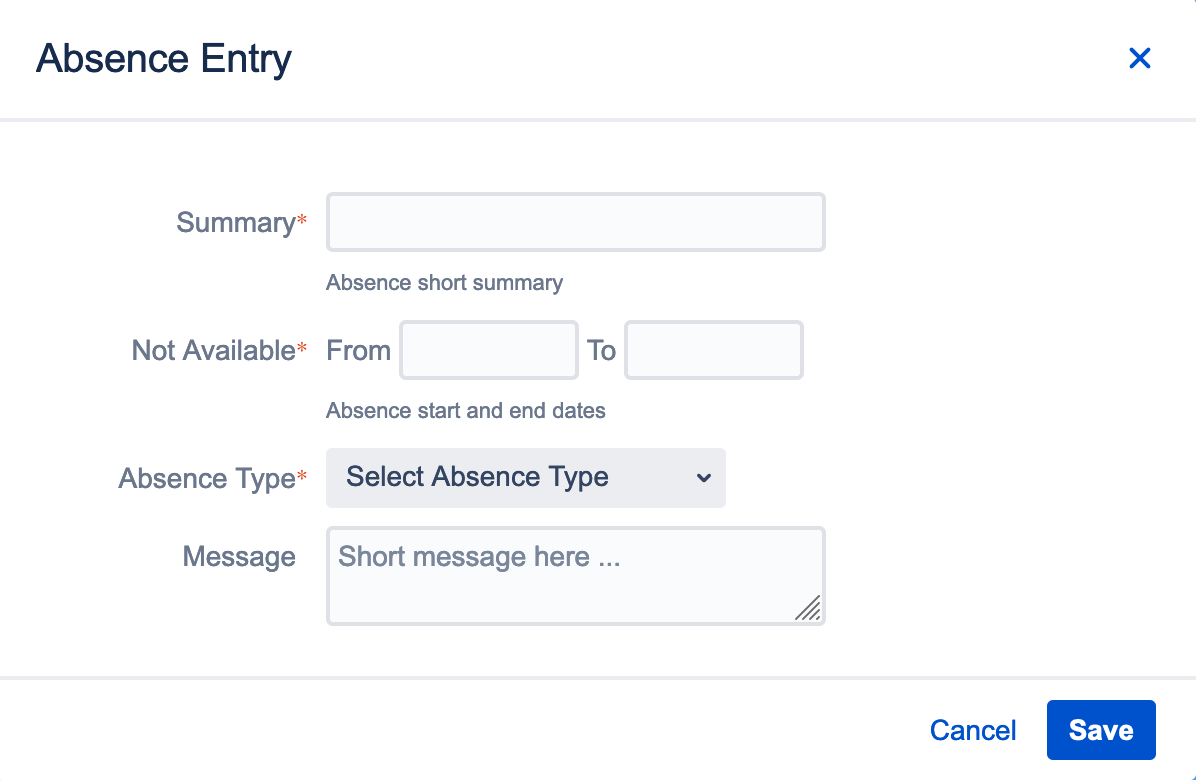
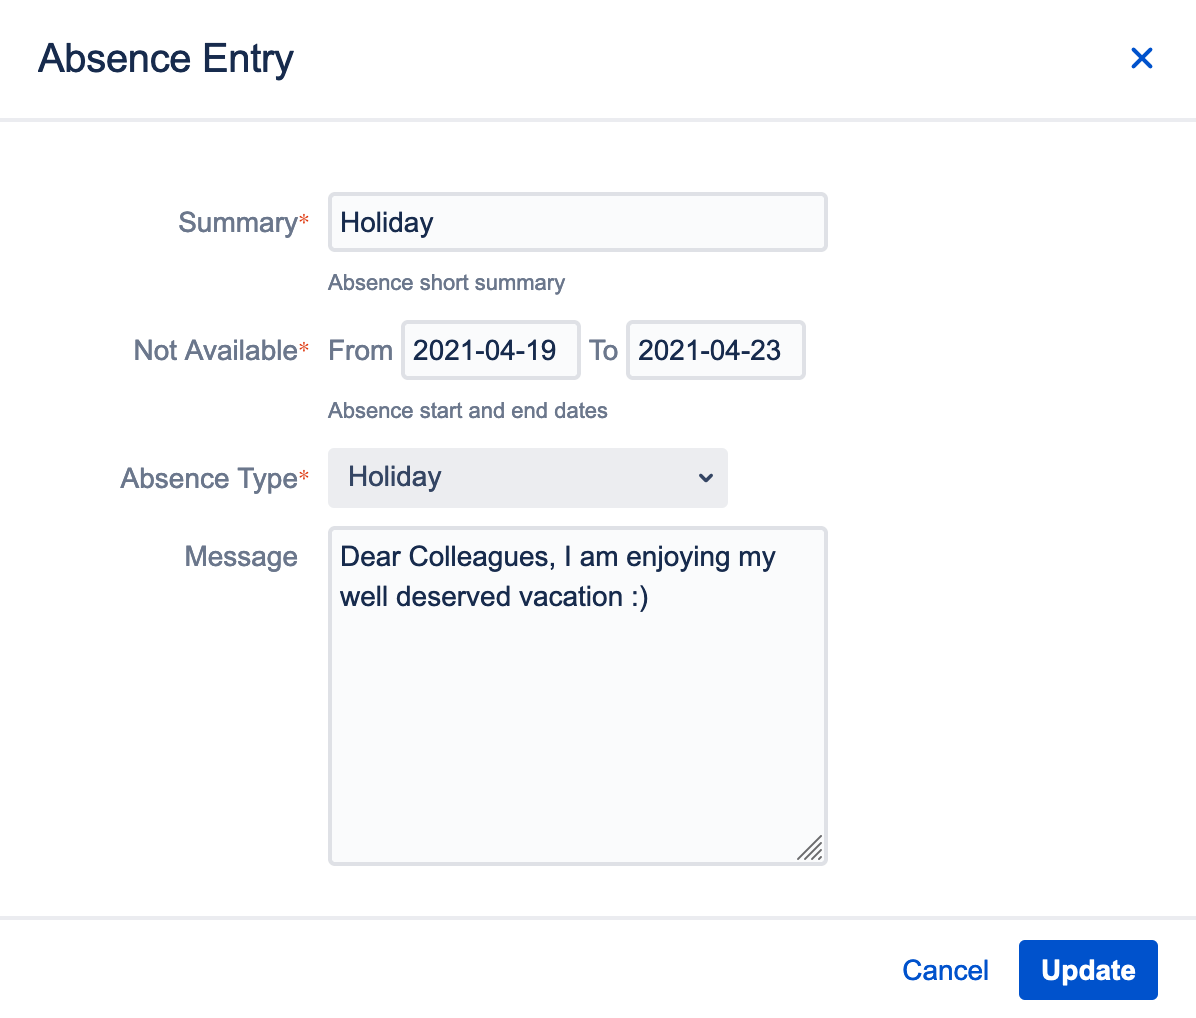
The following information can be inserted
Summary (mandatory): Add a title for your absence (e.g. Summer holidays, Visit of business partner)
From (mandatory): Select start date of your absence
To (mandatory): Select end date of your absence
Absence Type (mandatory): Select one of the following options
Business Trip
Training
Holiday
Sick Leave
Conference
Trade Fair Participation
Long Term Leave (e.g. Parental Leave, Sabbatical)
Others (everything that is not covered by the other options)
Message: Leave an optional message for your team
If you have planned your upcoming absences they will be displayed in list and calendar view below. The list view is ordered by absence date in descending order.
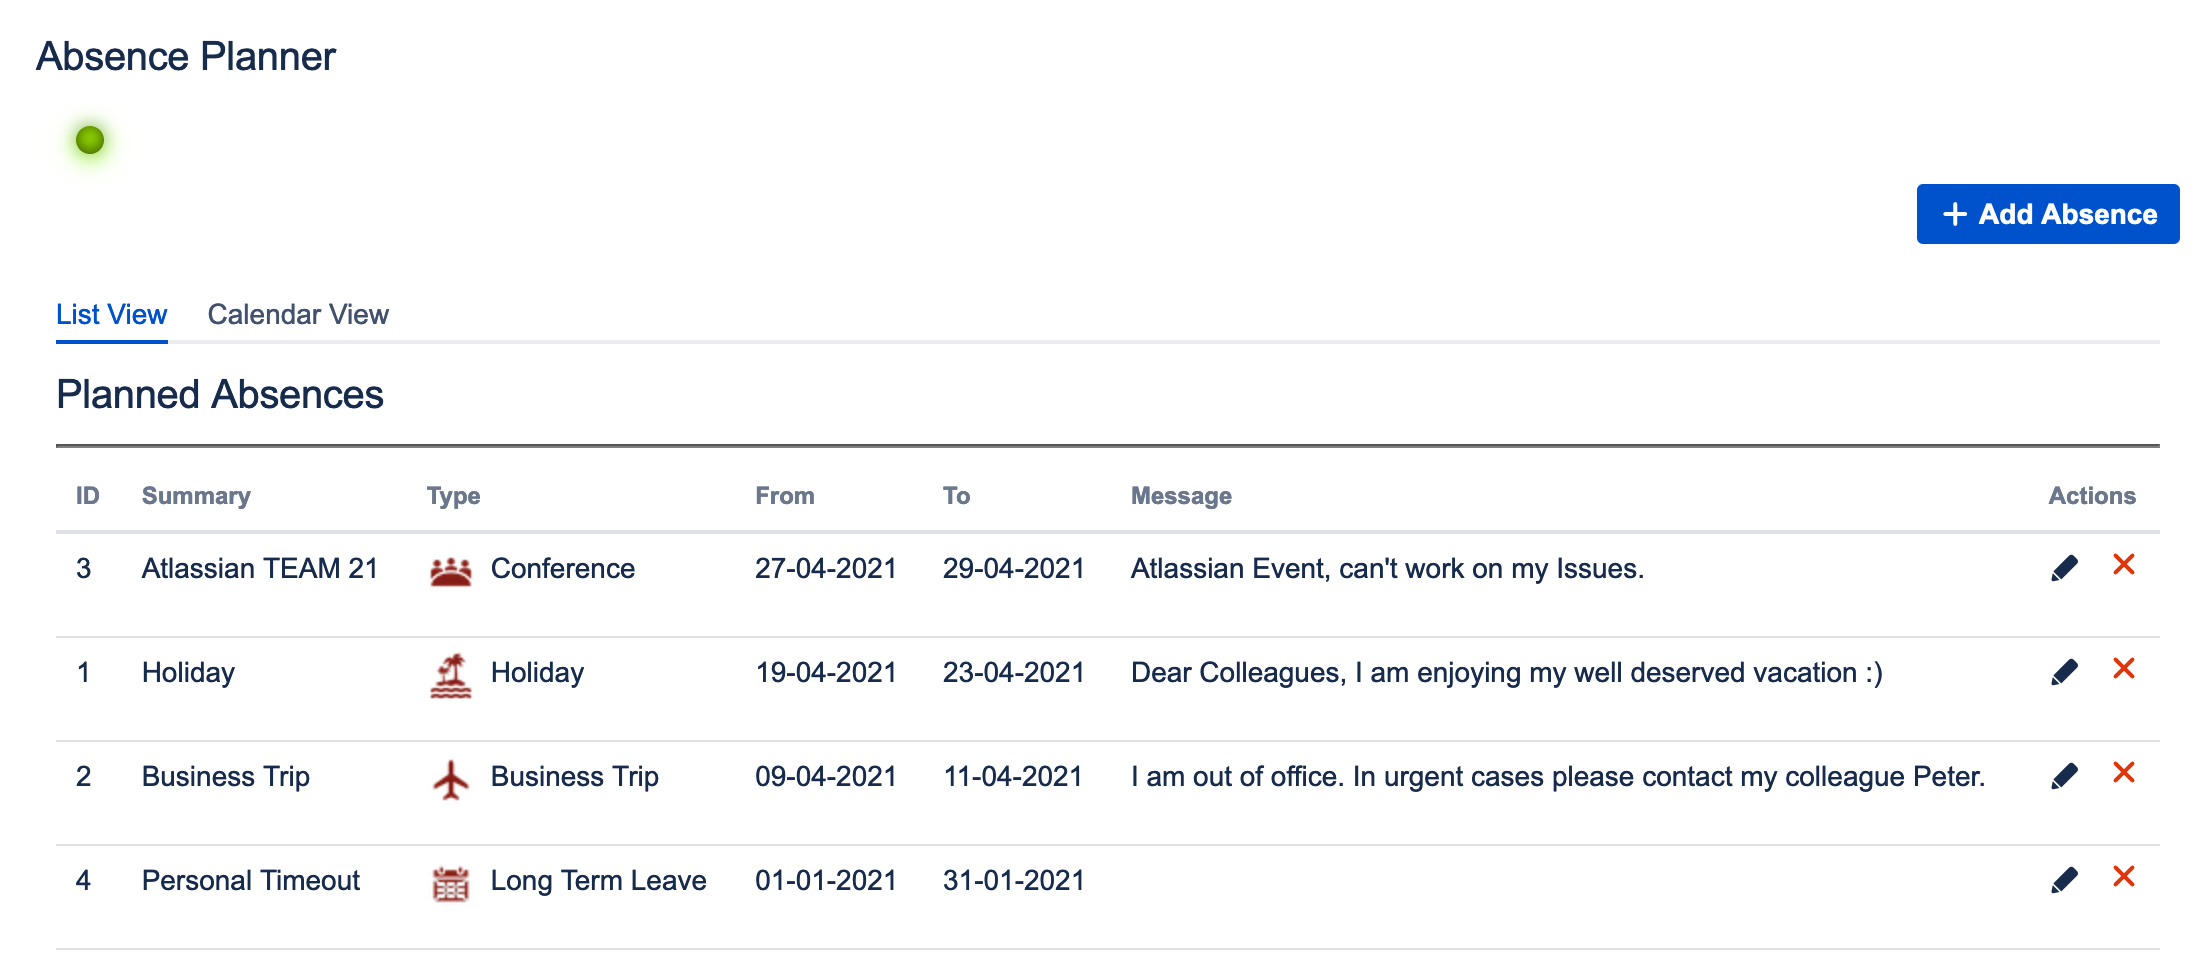
List View
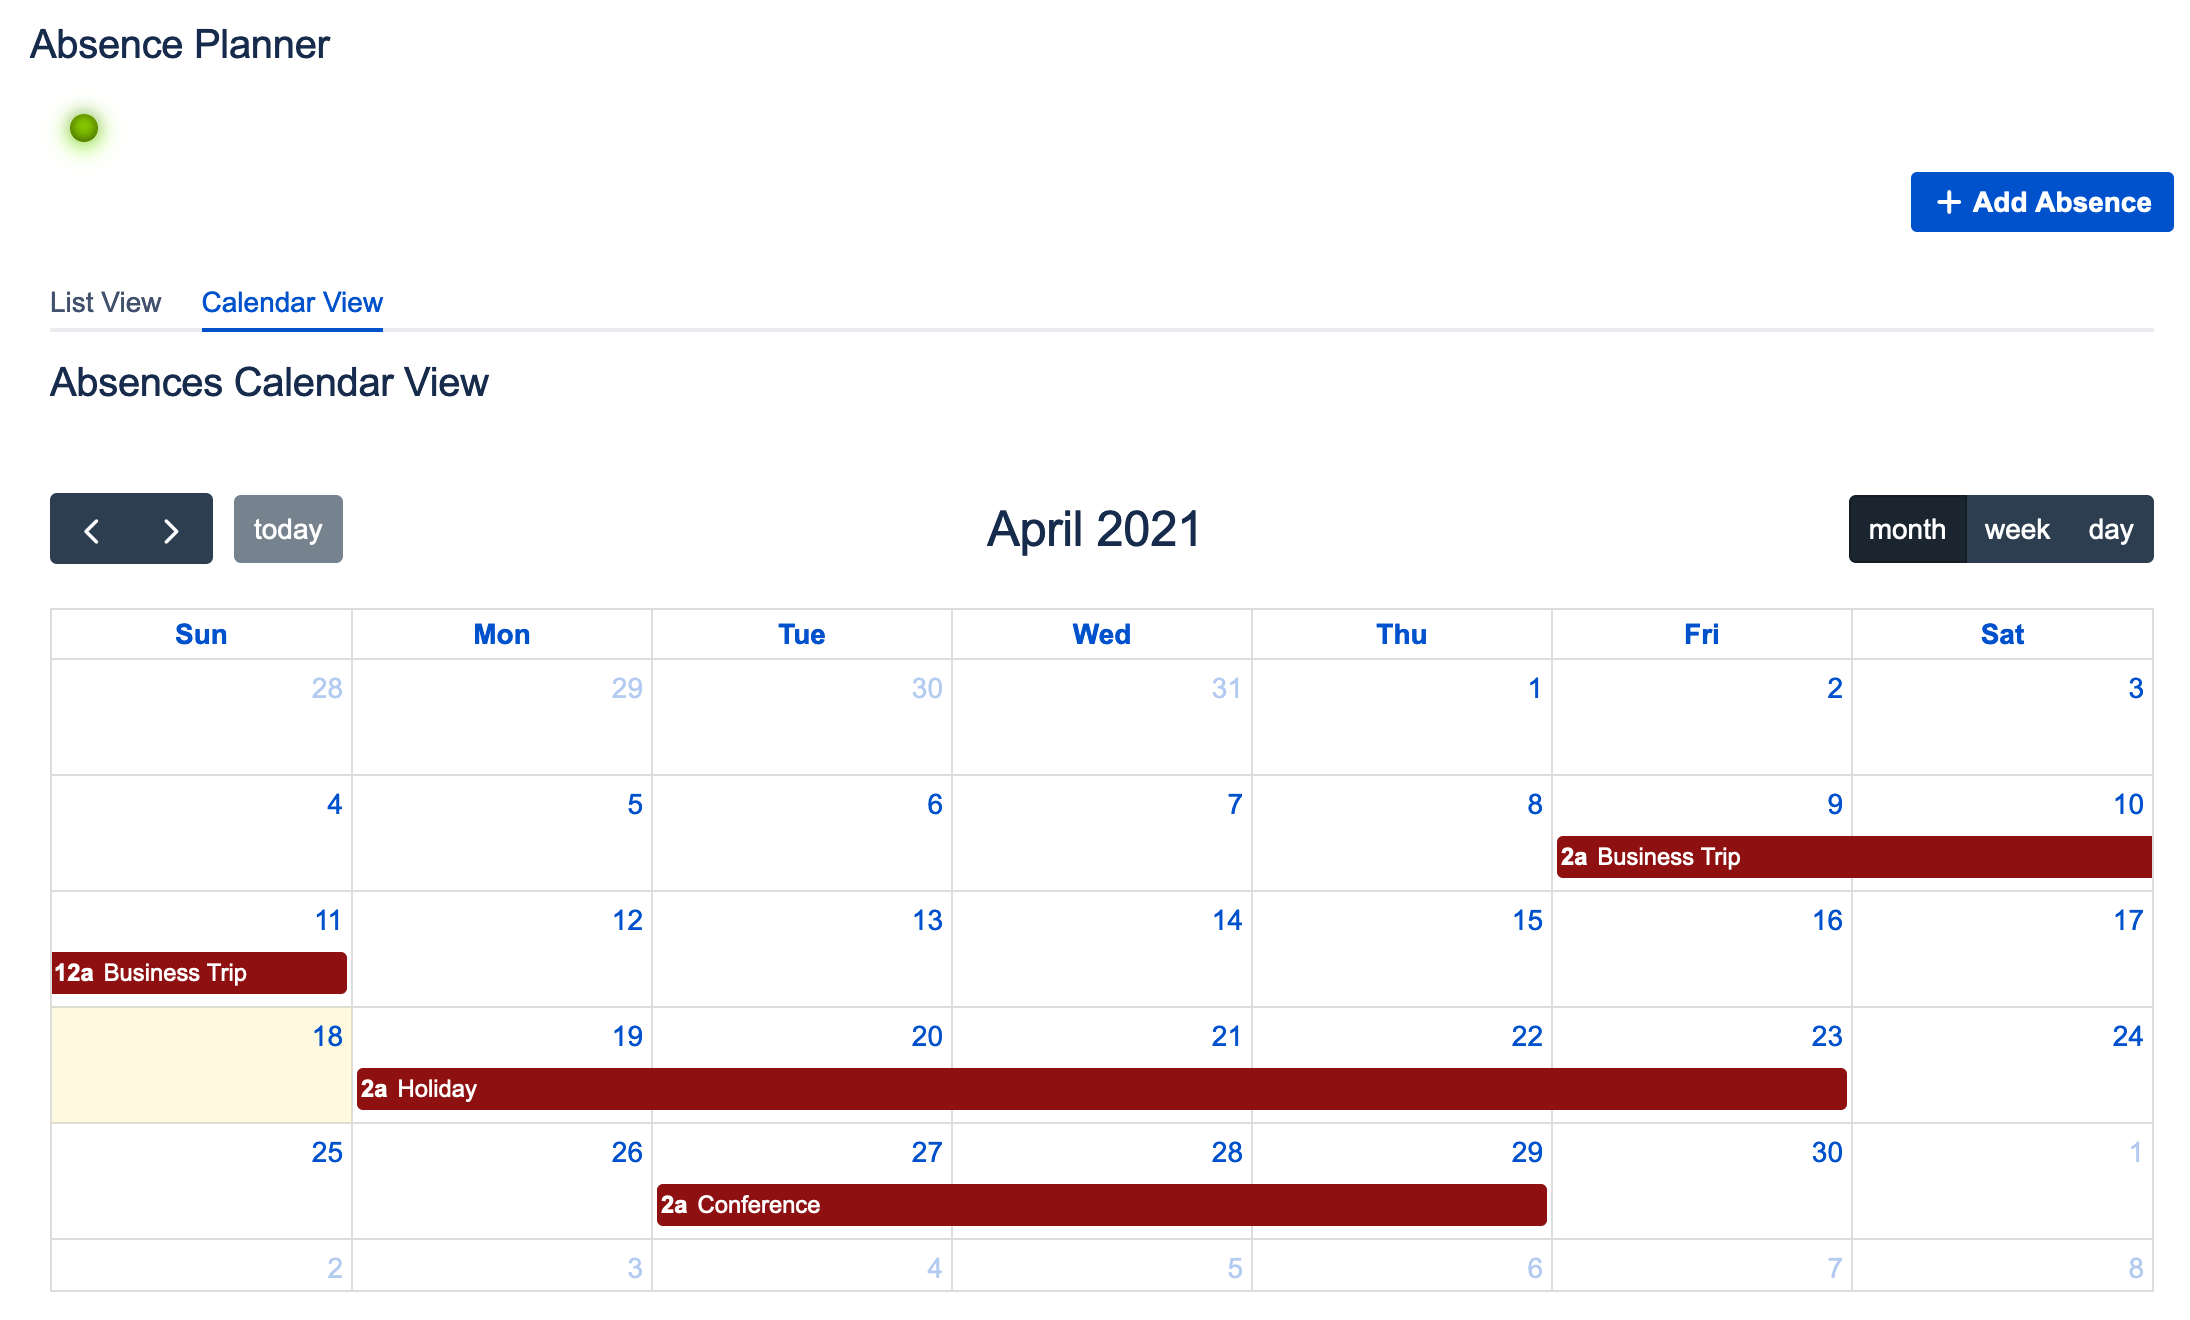
Calendar View
If your planned absences change, you can edit them by clicking on the edit icon in the actions column. Data can be changed on the opening dialog.
If planned absences are cancelled the respective list entry can also be deleted by clicking on the red “x” in the actions column.